Xrev API Tools: Increase Productivity!

Feeds

Loading...

Thursday, December 16, 2010

Roombook Extension for Revit 2011 Available

There is a new extension available from the Autodesk Subscription Centre website for particular locations.  The extension was originally developed for the German market, but has now been modified for wider international use.

Below is some information off the subscription site:


  • The program calculates the surfaces of walls, floors and ceilings as well as room circumference and furnishing elements on a per-room basis and in total. 
  • The calculation of each surface is made transparent by detailed listing of all sub areas. 
  • Apart from automatic detection of elements and sub areas, it is also possible to add further elements manually. Additionally, it is possible to illustrate situations with no constructive equivalent in the project, by numerical definition or graphical selection of detail or model lines (use case: tile panels). It is also possible to define a wall height reduction on a per-room basis, in order to calculate the material requirements in case of reflected ceilings. 
  • All sub areas can be modified manually, including materials. This allows to handle exceptions to the rule and special situations. 
  • Surface material types contain material definitions for walls, slabs, ceilings and room circumference, which are typically assigned to particular rooms (Example: Bathroom, Habitable Room Carpet etc.) This allows to assign surface materials to rooms with one click. 
  • The calculated quantities can be exported in a clear and detailed Excel form, separated in 
  1. Wall surfaces (including inner reveals, and window area per room in the Excel survey) 
  2. Floor surfaces (including threshold areas)
  3. Ceiling surfaces
  4. Room circumference 
  5. Furnishing elements and a survey which lists face to face all quantities per room and in total. 
  • Material requirements are listed per room and in total.  
  • Additionally is supported the export to a dwf-file which later can be opened and edited further in Autodesk Quantity Takeoff (QTO), as well as a CSV output


Find out more here:
Autodesk Subscription Centre

Friday, November 05, 2010

Collaborative Modeling with Revit Worksharing and Bluestreak

For those needing to communicate between offices and work on single models. Use Revit server coupled with Autodesk Bluestreak.

Now all we need is a multi-discipline solution to control those pesky architects moving structural elements or vice versa. (we've got one in the works...)


Saturday, October 09, 2010

Xrev Revit API Tools

Great News!

Our new Xrev website goes live next week.

www.xrev.com.au

it will also be accessible from www.cadway.com.au

Checkout Xrev Transmit! Our Revit issuing tool to take the pain out of issuing drawings whether it be hard copies, digital copies or both, as well as managing your transmittals... LEVERAGE ALL THAT INFORMATION IN YOUR REVIT MODEL for generating the transmittal rather than having to reproduce it in your file names and transmittal documents...

Soon to follow are:

Xrev Sheets
Xrev Transmit PRO

Making a completely parametric mobile crane - Final

Hi Everyone,

Again, sincere apologies for the delay in updates.  Please watch the below 3 videos for the final explanation of how I went about making this family.  Comments always welcome and any recommendations for what people what me to show next.

Cheers.


Thursday, September 30, 2010

Revit 2011 - Subscription Advantage Pack Released

If you haven't already, download the Revit 2011 Subscription Advantage Pack to get Revit Model Server & Conceptual Energy Analysis tools.


Finally a tool for teams that are spread across multiple offices...

NOTE: You must have a valid Subscription to do this and be logged into the Autodesk Subscription Centre.

http://subscription.autodesk.com/

Thursday, July 22, 2010

Revit 2011 - Creating a Parametric Shade Sail using Adaptive Components

In this video I'll demonstrate how something can be easily made very parametric using adaptive components for a tension structure such as a shade sail.

Why can't I see this element??!

Arggh, there is nothing worse than trying to find why an element isn't visible in a view, so many different potential causes that need to be checked.  I thought I'd put a little bit of a checklist together:

  1. Is the view "Discipline" set correctly?  For example if your view is accidentally or purposelly set to Structural the wall may not be showing because its non-bearing...
  2. Is the view range set correctly to see the particular element?  I'll often switch to my 3D view and orientate it to match the view, if I can't see it in the 3D view its most likely a view range issue.
  3. Is the element in the correct phase and is an appropriate phase filter set in the view to make it visible.  Maybe someone set it in a future phase?
  4. Can you see the element by enabling "Reveal Hidden Elements"?  If so, select it and select unhide element or unhide category.  Try not to use the Override element or hide in view options...
  5. Is the element in a worset that isn't open or turned on in the view?
  6. Is there a filter applied to the view that is causing the element to be hidden?
  7. Has someone used the linework tool on the element?
  8. If its a family, is the detail level of the view set correctly?  Sometimes families are set not to show at Coarse.
  9. If its a family, has someone selected the geometry of the element not to show in plan, section/elevation as the case maybe?
  10. Maybe the view has been created as a detail view?  By default certain categories aren't visible in a detail view...  As such change to a standard section.
  11. Is the element part of a design option and perhaps that isn't the current option for that particular view?
  12. Is there a plan region in the view that is adjust the view range settings incorrectly for the area in question?
  13. If its a datum, is the 3d extents of the datum intersecting the view?
  14. If its a section/elevation marker, check the "hide at scales coarser than" parameter to ensure its set appropriately to show.
  15. Is it part of a linked revit or dwg file?  Ensure that the link is loaded...
I think there are a few more, but that's all i can think of off the top of my head.  Feel free to post comments of any additional ones you think of and I'll add them.

Cheers!

I know this can do my head in sometimes!

Wednesday, July 21, 2010

Revit Sheet Management & Issuing Painful?

Who finds editing sheet/titleblock information tedious and slow?

What about adding consultant sheets and mass sheet lists into your project one at a time, what a pain...

Not to mention the issue process of exporting DWG, DWF/PDF, Hard Copies, file naming, uploading to online systems such as Team Binder/Aconex/IrisProjectMinder etc.  Prone to human error and so repetitious!

Filling out transmittals/repeating data entry multiple times, yuk...

Certainly don't want to have to manage tonnes of shared parameters and a difficult setup process!

Need a simple solution that's easy to use?

Well very soon we will be releasing our first amazing Revit enhancement bound to drastrically improve your productivity and sanity!

Stay tuned!

PS.  Post any special requests and we'll see what we can do :)  Also, add this blog to your Revit communication centre by using this RSS feed:  http://blog.cadway.com.au/feeds/posts/default

Monday, July 12, 2010

Making a completely parametric mobile crane - Overview

This video runs through the introduction and overview of how the family is setup.  If there are specific topics you'd like me to address in more detail please comment.

Friday, July 02, 2010

Making a completely parametric mobile crane

Throughout July I will be posting a series of videos demonstrating how I went about making this 150T parametric mobile crane.

The crane has:
  • Adjustable materials
  • Adjustable rotation
  • Adjustable extension
  • Adjustable support extensions
  • Adjustable boom angle
  • Adjustable cable drop/automatically stays perpendicular to the ground.
We will look at how we can add jigs, rules to stop the crane overextending/tipping.  I am interesting in any crane experts posting limitations they'd want to impose as I'm going on very limited knowledge of cranes so the values I use may not be correct, but the principles will be the same.

Tuesday, May 11, 2010

Revit Hatch Patterns (Hatch Kit)

Firstly apologies for my slackness in regular posts...
This question has come up a lot, and its how do I make custom hatch patterns for Revit?
Typically I'll recommend using Cadro's Hatchkit.

However, I recommend a different workflow to using hatchkit directly as the editor. I like to use the import DXF feature.
  1. Begin by starting up Revit.
  2. Start a new project.
  3. Start a drafting view, set the scale to 1:1 for a drafting pattern or 1:100 or similar for a model pattern.
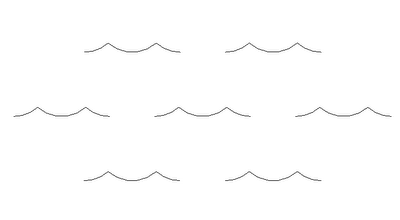
  4. Now using solid detail lines draw the pattern you'd like to create at the scale you require it. In my example I'm trying to create a water surface pattern (some waves).
  5. Next we need to outline a box/tile that if repeated would create a clean pattern and break our linework here.
  6. Then delete the excess linework. (leave the box there as this helps to define the size of the tile)
  7. Export to 2004 DXF format.
  8. Start HatchKit
  9. Go to File-->Import (change files of type to DXF entities) Find you file and import
  10. Now we just need to delete the box that we drew. Select each of them by clicking on the white box and delete. You actually end up deleting 6 lines...
  11. Finally add a name/description/comment then save as a Revit Model or Drafting pattern as required.
  12. Its now ready to be imported and used in Revit!